CLICK HERE FOR FREE BLOGGER TEMPLATES, LINK BUTTONS AND MORE! »
Showing posts with label vegetarian. Show all posts

Monday, May 6, 2013

Quinoa Black Bean Burrito Bowl

Underneath the generous helpings of salsa, sour cream, avocado and tomatoes here is a big bowl of cilantro-lime quinoa and yummy cilantro-infused cooked black beans topped with corn and cheese. 

Everything is mixed in here in this picture.  I am REALLY loving quinoa lately.  I've made several different recipes in the last few weeks and have loved them all!  I will be bringing them to the blog soon, kay? This was FABULOUS and I wish had a bowl of it sitting on my desk. right. now.

Quinoa Black Bean Burrito Bowl
from The Shiksa in the Kitchen
Yield: 4 servings


1 cup quinoa
1 tbsp olive oil
1/4 cup minced onion
1 clove garlic, minced
2 cans (15 oz each) black beans, rinsed and drained
1/4 cup chopped fresh cilantro
1/4 tsp chili powder (mild)
Pinch of cayenne pepper (spicy)
1/4 cup fresh lime juice
1 cup shredded lettuce
Salt

Optional toppings:
grated cheese
sour cream or greek yogurt
avocado
diced tomatoes
guacamole
corn 
pico de gallo or salsa
hot sauce or sriracha
guacamole


Rinse the quinoa in a sieve or mesh strainer under running water. Drain. Pour quinoa into a saucepan along with 2 cups of water. Bring the quinoa to a boil, then reduce heat to a low simmer. Cover the pot. Let the quinoa simmer for about 20 minutes till it becomes tender and all the liquid has been absorbed. Keep a close eye to make sure the quinoa doesn't burn.

While quinoa is cooking, heat 1 tbsp of oil in another saucepan over medium heat. Pour minced onion into the saucepan and saute for a few minutes till it softens and begins to turn brown. Add the minced garlic to the pot and let it saute for 1-2 minutes longer till aromatic.

Add the black beans to the pot of onions along with 1/2 cup water, 2 tbsp of chopped fresh cilantro, chili powder and cayenne pepper. Bring the beans to a boil, then reduce heat to medium low. Let the beans simmer for 15 minutes till the liquid is mostly evaporated. Stir in 2 tbsp of fresh lime juice. Season with salt to taste.

When the quinoa is fully cooked, remove from heat and fluff with a fork. Use the fork to mix in 2 tbsp of chopped cilantro and 2 tbsp fresh lime juice. Season with salt to taste.

Assemble your burrito bowls. Divide the cilantro lime quinoa between four bowls. Top each portion of quinoa with 1/4 cup of shredded lettuce, simmered black beans and optional toppings.  Serve warm.

Thursday, April 25, 2013

Baked Mushroom Rice


Oookayy so I truly am a mushroom lover.  Honestly, I think my favorite kind of pizza is cheese with mushrooms. I must be 80 years old or something.  But I feel a tad better because my meat-loving husband also adores mushroom pizza.  So there.  It's cool to love mushrooms.
Anyway... even if you don't love mushrooms all that much, you will most likely, probably still love this dish.  I pretty much am obsessed with it and want to make it again right now.  It's got a TON of flavor.  a ton.  The only thing I think I will change next time is that I will use brown rice instead of white because brown rice is much healthier.  This recipe is from the Our Best Bites cookbook- a really awesome blog with awesome recipes.

P.S. I tried this with chicken broth as well, and it did NOT taste the same- it is much better with the beef broth.


Baked Mushroom Rice
from Our Best Bites, published on Sue's Favorites
Yield: 6-8 servings

2 Tbsp. butter
1/2 cup onion, chopped
1 cup sliced mushrooms
3 cups beef broth
1/2 cup apple juice
1 Tbsp. white vinegar
3/4 tsp. kosher salt
1 tsp. freshly ground black pepper
2 cups long grain rice, uncooked
Preheat oven to 375 degrees. Spray a 9x13 inch dish with nonstick cooking spray and set aside. Melt butter over medium heat. Add chopped onion and cook, stirring frequently for 2 minutes. Add mushrooms. Continue cooking until onions are translucent and mushrooms are tender. Remove from heat. Combine remaining ingredients in the pan. Transfer mixture into 9x13 dish. Cover tightly with foil. Bake for 45-60 minutes or until liquid is absorbed. Stir before serving.

Nutrition Facts: (1/6 of recipe) 158 calories, 5g fat (3g saturated), 10mg cholesterol, 1400mg sodium, 1g fiber, 5g protein

Vegetable Lime Chickpea Chili


K what is up with the Arizona weather lately? Seriously three days ago it was 60 degrees and now this week it's forecasted to get into the 90's.  What the what? Not to mention it snowed a couple weeks ago! Snow in Arizona. Fur-real. Anyways I'm kinda bummed because chili and soup is technically a lot yummier to eat and more appropriate when it is at least slightly chilly outside.  And now the weather has (almost) screwed up my plans to give you this great recipe.  'Cause I figure that guess what? This will still taste just as good in 80 degree weather as it will in 50 degree weather. No warm spell is gonna bring me down! Anddd maybe, just maybe, you are actually somewhere where it IS still chilly! Yay for you!  But, seriously, this chickpea chili is very fabulous at any time of the year.  My meat-loving husband loved it in all its veggie glory.  I have an idea- if it is warm where you are (like AZ) simply blast your AC to winter conditions.  (Oh my husband would just LOVE that!) Then enjoy this soup? Sounds good to me.

Vegetable Lime Chickpea Chili
from the Picky Palate cookbook, published on Two Peas and Their Pod
Yield: 6-8 servings

2 tablespoons extra-virgin olive oil
1 1/2 cups finely chopped white onion
1 1/2 cups chopped zucchini
1 1/2 cups yellow squash
1 cup chopped mini sweet peppers (I just chopped one red bell pepper)
1 8-ounce package baby bella mushrooms, sliced
2 tablespoons minced garlic
2 15-ounce cans chickpeas, drained and rinsed
1 28-ounce can diced tomatoes
2 cups vegetable broth
1/2 cup chopped fresh cilantro leaves
3 tablespoons lime juice
2 teaspoons ground cumin
1 teaspoon chili powder
1 teaspoon kosher salt
1/2 teaspoon freshly ground black pepper
Optional: shredded cheese and sour cream as toppings

Heat the olive oil in a Dutch oven or large pot over medium heat. Add the onion, zucchini, yellow squash, sweet peppers, and baby bells and cook, stirring, until tender, 5-8 minutes. Add the garlic and cook, stirring, for 1 minute. Add the chickpeas, tomatoes, broth, cilantro, lime juice, cumin, chili powder, salt, and pepper, stir to combine and cook until hot, about 5 minutes. Reduce the heat to low and simmer until ready to serve. Top with cheese and sour cream if desired.

Nutrition Facts: (1/6 of recipe) 265 calories, 6.5g fat (0.9g saturated), 1513mg sodium, 11g fiber, 10g protein

Tuesday, January 31, 2012

The Best Broccoli You'll Ever Have

So sometimes Pinterest is the best invention ever. I mean, you get to look at photos of the perfect house, perfect food, gorgeous girls with the perfect bodies in perfect clothes... what a great way to feel so uplifted about our own perfect lives, right?! Ha but no I really do enjoy it. I tried one of the recipes I pinned just a few days ago- it advertised that this was "the best broccoli you'll ever have..."

The best? I've never even had really good broccoli so I didn't have much to compare it to. BUT nevertheless I wanted to try it out since I had all the ingredients.

And... it is phenomenal!! Soo flavorful and crunchy and tart and sweet and just all around amazing. It will become a routine side dish for me for... ever.

Amazing Roasted Broccoli

1-2 heads of broccoli, cut into small parts
3-4 Tbsp. olive oil
1 1/2 tsp. salt
1/2 tsp. pepper
3-4 garlic cloves, sliced
zest of a lemon
juice of a lemon
3 Tbsp. pine nuts (optional)
1/3 cup freshly grated parmesan cheese (I used thinly grated Monterey Jack)

Preheat oven to 425. Now the key is to have SUPER dry broccoli. I didn't wash because I believe the high temperature of the oven will kill the bacteria... but if you do wash, then dry obsessively. Place on cookie sheet lined with foil. Toss with 3 Tbsp. olive oil, salt and pepper. Add garlic slices in with the broccoli. Roast in the oven for 20 to 25 minutes, until "crisp-tender and the tips of some florets are browned."

After you take it out, zest a lemon over the broccoli, and squeeze the juice over it as well. Add 1 more Tbsp. of olive oil, pine nuts, basil and cheese.

And enjoy!!!!

The second part of this picture (the chicken and rice will come later- this chicken recipe is not to miss!)

Tuesday, November 15, 2011

A Thanksgiving Favorite: A Paula Deen Staple!

My mom and I started a new Thanksgiving side dish a couple years ago that is not completely traditional to your average Thanksgiving dinner.  We made macaroni and cheese. Yes, you heard me! Creamy, cheesy, and fat-laden, Paula Deen's macaroni and cheese is the BEST macaroni and cheese I've ever had.  Hand's down.  It wins in all categories: cheesiness, creaminess, easiness and (unfortunately) probably unhealthiest as well. :/  But we are talking Thanksgiving here.... I'm sorry but that is no day to diet.  If you are only making this ONE day a year, then I think it's perfectly and marvelously allowable!


I LOVE green bean casserole, sweet potatoes and pie, don't get me wrong. But this is the dish I'm looking forward to most this year! It's my all-time favorite!
The only alterations we made to the recipe were that we left out the eggs, based on the reviews.

Creamy Macaroni and Cheese 
adapted from Food Network

Ingredients
2 cups uncooked elbow macaroni (an 8-ounce box isn't quite 2 cups)
4 tablespoons (1/2 stuck) butter, cut into pieces
2 1/2 cups (about 10 ounces) grated sharp Cheddar cheese
1/2 cup sour cream
1 (10 3/4-ounce) can condensed Cheddar cheese soup
1/2 teaspoon salt
1 cup whole milk
1/2 teaspoon dry mustard
1/2 teaspoon black pepper

Boil the macaroni in a 2 quart saucepan in plenty of water until tender, about 7 minutes. Drain. In a medium saucepan, mix butter and cheese. Stir until the cheese melts. In a slow cooker, combine cheese/butter mixture and add the eggs, sour cream, soup, salt, milk, mustard and pepper and stir well. Then add drained macaroni and stir again. Set the slow cooker on low setting and cook for 3 hours, stirring occasionally.

Wednesday, October 19, 2011

Smoked Cheddar Macaroni and Cheese

 I don't know who first decided that mac 'n cheese was a "kids" food.  Of course almost all kids love it, but is there some rule that says that people must unlike the cheesy goodness of noodles drenched in a butter/cheese/milk sauce once they become adults?

Well I think that's crazy.  Pretty much, macaroni and cheese is one of my top 10 foods.  Ever. This recipe is not your traditional mac 'n cheese, but it is rich and extremely flavorful and definitely gives good ole' cheddar mac a run for its money.  I could not find 100% smoked cheddar, but found a blend of smoked shredded cheeses at Trader Joe's.  I think that was my favorite part about this recipe- the smoked cheese brings so much flavor and... smokiness!  This is a hot, hot recipe, my friends! (Hot as in amazing/hip/cool, not spicy. It's not spicy.) Definitely designed for a much older, maturer palate! ;)


Smoked Cheddar Mac 'n Cheese
from Betty Crocker

3
 cups uncooked elbow macaroni (12 oz)
1 1/2
cups whipping cream*
teaspoon Dijon mustard
1/2 
teaspoon coarse (kosher or sea) salt
1/4
  teaspoon ground red pepper (cayenne)
8
  oz smoked Cheddar cheese, shredded (2 cups)
2
  cans (14.5 oz each) Muir Glen® organic fire roasted diced tomatoes, well drained
1/4
  cup sliced green onions (4 medium)
1/3 
cup grated Parmesan cheese
1/3 
cup Progresso® plain bread crumbs
teaspoons olive oil

  1. Cook and drain macaroni as directed on box. Return to saucepan; cover to keep warm.
  2. Meanwhile, heat oven to 375°F. Spray 13x9-inch (3-quart) glass baking dish with cooking spray. In 2-quart saucepan, heat whipping cream, mustard, salt and red pepper to boiling. Reduce heat; stir in Cheddar cheese with wire whisk until smooth.
  3. Pour sauce over macaroni. Stir in tomatoes and onions. Pour into baking dish. In small bowl, mix Parmesan cheese and bread crumbs. Stir in oil. Sprinkle over top of macaroni mixture.
  4. Bake uncovered 15 to 20 minutes or until edges are bubbly and top is golden brown.
Makes 8 servings (1 1/4 cups each)
*Make sure to use whipping cream in this recipe.  Even though it is higher fat, if you use milk or half and half, they are more likely to curdle when added to the acidic ingredients- the tomatoes.

Tuesday, August 23, 2011

Spinach Lasagna Rolls

As much as I hesitate to admit it, I sometimes stay away from foods that have the word spinach in the title.  I don't necessarily hate the leafy green, but in order for me to eat it, it's gotta be surrounded by lots of other delicious ingredients! 

That being said... in NO way do I find this main dish even slightly unlike-able.  For one, it's a fabulous way to use up leftover lasagna noodles.  It's also incredibly cute- little rolls of lasagna filled with creamy, savory yummy goodness! Most importantly- these are delicious! I was so excited to eat the leftovers over the next few days!

I found this recipe linked to a recipe for a homemade sauce to use instead of store-bought.  I hesitated, but I ended up making the homemade and loved it!! I really think it was what made this meal so delicious~ yum!

Spinach Lasagna Rolls
 from Skinny Taste

Servings: 9 Serving Size: 1 roll Old Points: 4 pts Points+: 6 ww pts
Calories: 224.9 • Fat: 5.1 g Fiber: 3.4 g Protein: 13.0 g Carbs: 31.5

  • 9 lasagna noodles, cooked
  • 10 oz frozen chopped spinach, thawed and completely drained
  • 15 oz fat free ricotta cheese (I like Polly-o)
  • 1/2 cup grated Parmesan cheese
  • 1 egg
  • salt and fresh pepper
  • 32 oz tomato sauce
  • 9 tbsp (about 3 oz) part skim mozzarella cheese, shredded
Preheat oven to 350°. Combine spinach, ricotta, Parmesan, egg, salt and pepper in a medium bowl. Ladle about 1 cup sauce on the bottom of a 9 x 12 baking dish.

Place a piece of wax paper on the counter and lay out lasagna noodles. Make sure noodles are dry. Take 1/3 cup of ricotta mixture and spread evenly over noodle. Roll carefully and place seam side down onto the baking dish. Repeat with remaining noodles.

Ladle sauce over the noodles in the baking dish and top each one with 1 tbsp mozzarella cheese. Put foil over baking dish and bake for 40 minutes, or until cheese melts. Makes 9 rolls.

To serve, ladle a little sauce on the plate and top with lasagna roll.

Sunday, July 31, 2011

Basil Spaghetti with Cheesy Broiled Tomatoes


Men: beware.  This is total chick food.  Cheesy broiled tomatoes over garlicky, basil-y cheesy pasta?  Mmm-hmm.  Sounds like a perfect meal to me.  As for my husband?... He'd ask where the meat was.
Me?  Didn't miss it at all. This was great!

Basil Spaghetti with Cheesy Broiled Tomatoes 
From Noble Pig

12 ounces spaghetti
3 large beefsteak tomatoes (about 1-1/2 pounds), each cut into 4 thick slices
3 Tablespoons olive oil, plus more for the baking sheet
Kosher salt and black pepper
8 ounces mozzarella, grated
1/4 cup grated Parmesan
2 cloves garlic, minced
1/4 teaspoon crushed red pepper
3/4 cup torn fresh basil leaves & more for serving.

Heat broiler.  Cook the pasta according to the package directions; drain and return to pot.

Meanwhile, arrange the tomato slices in a single layer on a lightly oiled rimmed baking sheet.  Season with salt and pepper.  Dividing evenly, sprinkle the slices with the mozzarella and Parmesan.  Broil until the cheese is bubbly and golden, 3 to 5 minutes.

In a small saucepan, warm the oil with the garlic and red pepper over medium heat until fragrant, 1 to 2 minutes.

Add the garlic oil, basil, salt and pepper to the pasta and toss to combine.  Serve topped with tomatoes, additional basil and more Parmesan.

Tuesday, July 26, 2011

Creamy Alfredo Spaghetti with Asparagus


I will tell you right now that my husband just thought this was "okay."  He still ate it, of course (he's good enough to at least eat whatever I put in front of him) but it wasn't his favorite dish ever... probably because he is used to eating Olive Garden-style fettuccine alfredo.  And this recipe, my friend is lighter and healthier than Olive Garden-style fettuccine alfredo.


BUT, in my own opinion, I think it is no less delicious, just different.  But in a good way!  When you can appreciate the fact that you are eating a guilt-free version of one of the guiltiest dishes on this earth- that is a LOT to love!  Add in the fact that the taste really is fantastic (I recommend you don't compare it to another-style of fettuccine alfredo and just take it as it is) and you have a new favorite weeknight meal!

Lighter Alfredo Spaghetti with Roasted Asparagus
from Cooking Light

  • 2 cups 1% low-fat milk
  • 1/3 cup (3 ounces) 1/3-less-fat cream cheese
  • 2 tablespoons all-purpose flour
  • 1 teaspoon salt
  • 1 teaspoon butter
  • 3 garlic cloves, minced
  • 1 cup (4 ounces) grated Parmigiano-Reggiano cheese (or parmesan)
  • 1 pound asparagus, trimmed and cut into 2-inch pieces (about 2 cups)
  • Cooking spray
  • 8 ounces uncooked whole wheat spaghetti
  • 8 ounces uncooked spaghetti (or you can use 16 oz. either regular or whole-wheat spaghetti)
  • 2 tablespoons truffle oil or olive oil
  • 1/4 teaspoon freshly ground black pepper
Preparation
  • Preheat oven to 425°.
  • Combine first four ingredients in a blender; process until smooth.
  • Melt butter in a saucepan over medium-high heat. Add garlic; sauté 30 seconds. Add milk mixture to pan; cook 3 minutes or until mixture simmers, stirring constantly. Cook 2 minutes or until thickened, stirring constantly. Remove from heat; stir in cheese. Cover.
  • Place asparagus on jelly-roll pan coated with cooking spray. Bake at 425° 10 minutes or until browned, stirring once.
  • Cook both pastas according to package directions, omitting salt and fat; drain well.
  • Place pastas and asparagus in a large bowl. Add cheese mixture, tossing well. Add truffle oil and pepper; toss gently. Serve immediately.
Yields: 8 servings (serving size: 1 cup)

Nutritional Information: (per serving) 296 calories, 11.4g fat (5.2g saturated), 14.5g protein, 34.9g carbohydrate, 3.7g fiber

Sunday, May 22, 2011

Vegetarian Lasagna

This lasagna is FABULOUS!!  In an effort to eat a little less meat recently, I've been searching for vegetarian recipes that are healthy and great-tasting.  Well, this one is a winner!
 I found the recipe on Pillsbury.com.  To be honest, first it was the picture that sold me.  It looked so delicious...second, it was the ingredients.  Mushrooms (I love them!) and cottage cheese (it is SO good in lasagna recipes) seemed like great ingredients to this awesome meal.


I am definitely going to make this over and over again... my husband and I absolutely loved it and did not miss the meat at all!


Vegetarian Lasagna

INGREDIENTS
2 cups tomato pasta sauce
1 medium zucchini, shredded (1 cup)
1 (12-oz.) container (1 1/2 cups) low-fat cottage cheese or 1 (15-oz.) container low-fat ricotta cheese
1 9-oz.) pkg. Green Giant® Frozen Spinach, thawed, squeezed to drain well
1/3 cup grated Parmesan cheese
2 tablespoons chopped fresh oregano or 1 1/2 teaspoons dried oregano leaves
8 precooked lasagna noodles (shelf-stable or frozen), each about 7x3 inches (can use uncooked noodles, just cook them before, and trim if too long)
1 (4-oz.) can Green Giant® Mushroom Pieces and Stems, drained
8 oz. (2 cups) shredded mozzarella cheese
DIRECTIONS
  • 1. Spray 12x10-inch sheet of foil with nonstick cooking spray. In medium bowl, combine pasta sauce and zucchini; mix well. In another medium bowl, combine cottage cheese, spinach, Parmesan cheese and oregano; mix well.
  • 2. Spread 1/4 cup sauce mixture in ungreased 8-inch square (2-quart) glass baking dish. Top with 2 lasagna noodles. Spread about 1/2 cup sauce mixture over noodles. Drop 1/2 cup of spinach mixture by small spoonfuls over sauce mixture; spread carefully. Sprinkle with 1/4 of mushrooms and 1/2 cup of the mozzarella cheese.
  • 3. Repeat layers 3 more times, beginning with noodles. Cover with foil, sprayed side down; refrigerate at least 8 hours or overnight.
  • 4. Heat oven to 400°F. Bake covered for 45 minutes.
  • 5. Uncover baking dish; bake an additional 10 minutes or until lasagna is bubbly around edges. Let stand 10 minutes before serving.
 Nutritional Information (per serving):  Calories 395, Total Fat 13g (Saturated Fat 6g)

Thursday, April 28, 2011

Holiday Green Bean Casserole


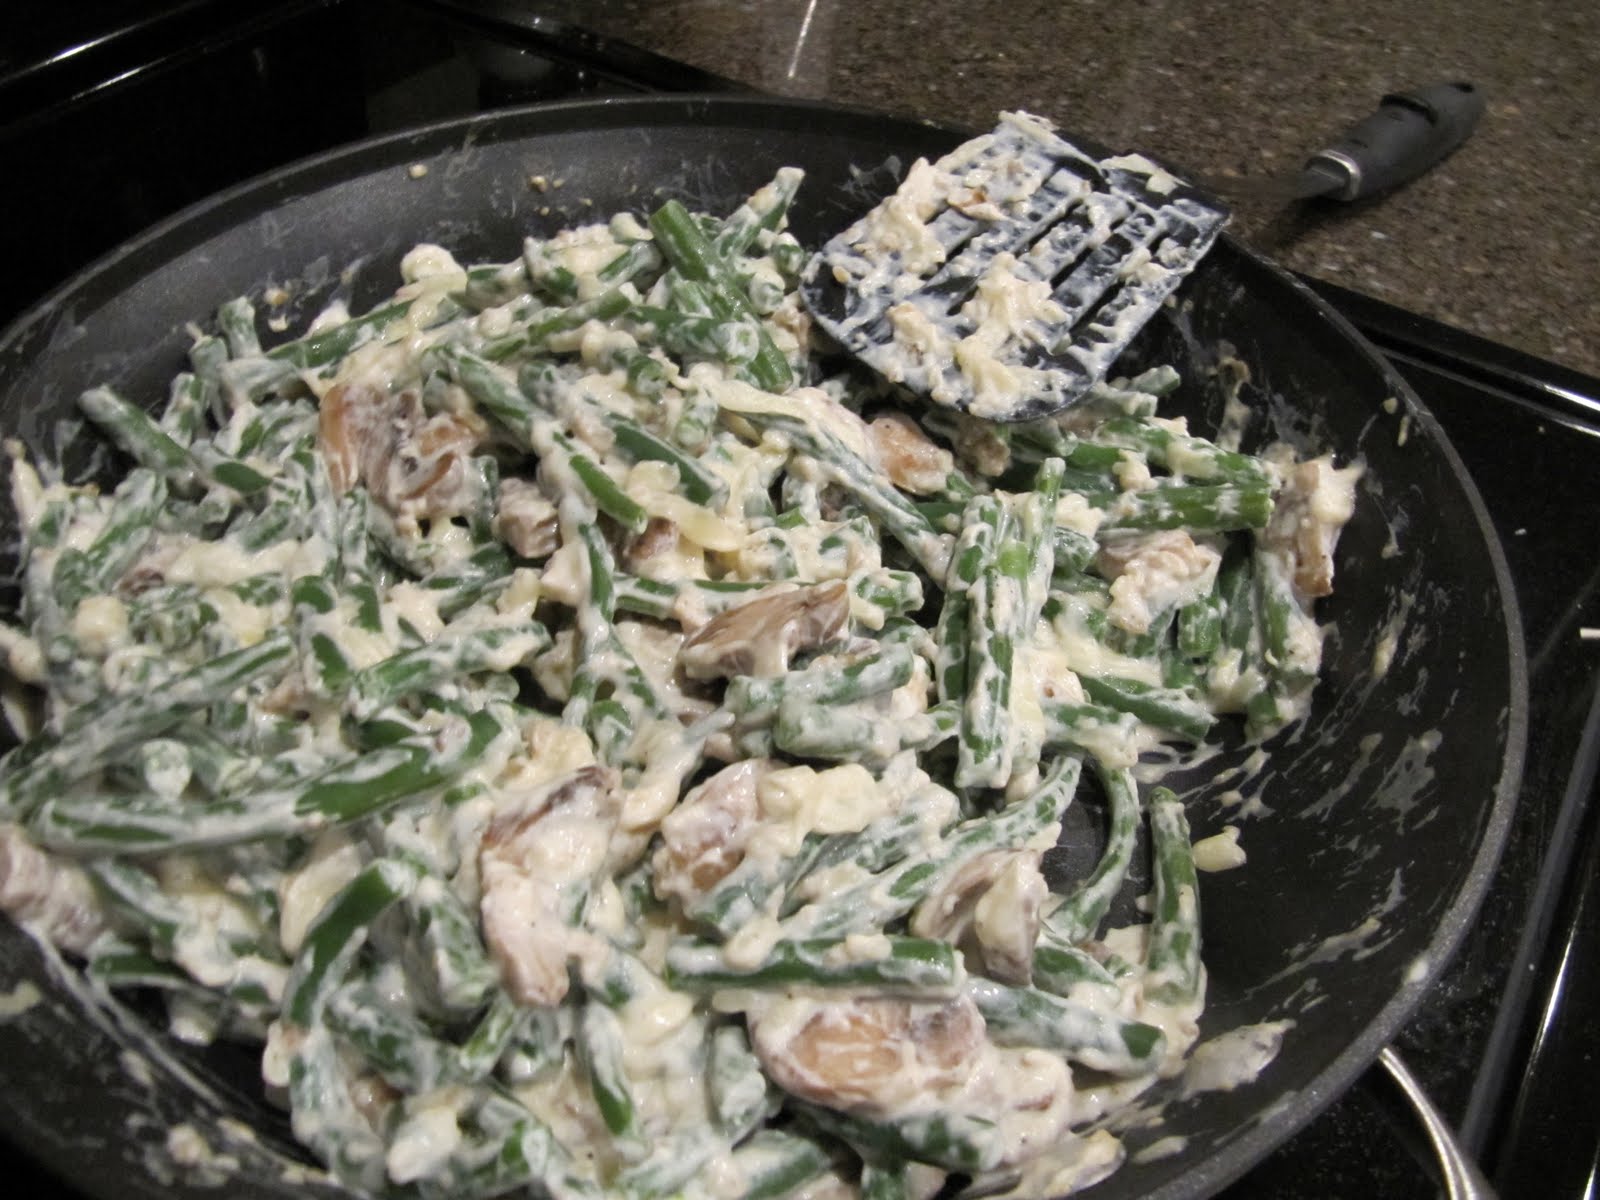
Okay, so I know that Green Bean Casserole is traditionally consumed on Thanksgiving.  And, let's face it- that recipe off the back of the French's fried onion can is SO good!  I started thinking- really radical thinking here- that none of the ingredients in green bean casserole are particularly designated "holiday" or "Thanksgiving" ingredients...green beans? No.  Mushrooms? Nope.  Fried onions? nada.  So why not apply the "holiday" part of the recipe name to Easter? Eh eh?


However, I did NOT make the traditional recipe from French's onion can.  I found this recipe in my Taste of Home cookbook, a healthier version, which guaranteed that "you'll never go back to the old version after trying these green beans!"  Now I don't know if I'd be so bold as to say that I will never ever go back to eating those... after all I'm not even the one who makes it on Thanksgiving... but this WAS very good.  It was lighter and healthier and very flavorful and cheesy.  Just be sure to boil the green beans for long enough- check that they are the right texture- because ours were just a tad crispier than we intended.  But it was still great.


Holiday Green Beans
Holiday Green Be
  • 8 cups cut fresh green beans (about 2 pounds)
  • 1/2 pound sliced fresh mushrooms
  • 2 tablespoons butter
  • 2 tablespoons all-purpose flour
  • 1 teaspoon dried minced onion
  • 1/2 teaspoon pepper
  • 1/2 cup fat-free milk
  • 1 cup reduced-fat sour cream
  • 1 teaspoon Worcestershire sauce
  • 1-1/2 cups (6 ounces) shredded reduced-fat Swiss cheese

  • TOPPING:
  • 1/3 cup slivered almonds
  • 1/3 cup crushed cornflakes
  • 1 tablespoon butter, melted

  • Place beans in a Dutch oven and cover with water; bring to a boil. Cover and cook for 3-5 minutes or until crisp-tender; drain and set aside.
  • In a large skillet, saute mushrooms in butter until tender. Stir in the flour, onion and pepper until blended. Gradually stir in milk. Bring to a boil; cook and stir for 1-2 minutes or until thickened. Remove from the heat; stir in sour cream and Worcestershire sauce. Stir in beans and cheese until blended.
  • Transfer to an 11-in. x 7-in. baking dish coated with cooking spray (dish will be full). Combine topping ingredients; sprinkle over the top.
  • Bake, uncovered, at 400° for 12-16 minutes or until bubbly and heated through. Yield: 12 servings.


Nutrition Facts: 2/3 cup equals 144 calories, 7 g fat (3 g saturated fat), 20 mg cholesterol, 108 mg sodium, 12 g carbohydrate, 3 g fiber, 9 g protein. Diabetic Exchanges: 1 lean meat, 1 vegetable, 1 fat, 1/2 starch

Monday, April 25, 2011

Veggie Quesadillas

After loads and eons of junk food and candy yesterday (hello Easter Bunny), I feel confident in saying that I am GLAD to be back on a regular eating schedule again.  ("Easter" seemed to last the whole weekend with one of my best friends getting married on Saturday- Saturday's wedding and Sunday's Easter celebration were just full of free treats and gimmes)

And boy is this recipe perfect for a sugar OD (overdose) reversal.  Because it's full of veggies and healthy goodness.

These veggie quesadillas are really, really good.  I promise you that you will not even notice that there is no meat in them.
Speaking of meat, I have recently decided that I want to eat far less meat in my diet.  

I am a student at ASU studying nutrition and we recently learned all the details about how we get meat/poultry.  I have always been a meat lover but since that class, I honestly can say that I do not look at meat in the same way.  The few days following last week's lecture, I have found meat to almost appall me- it didn't even TASTE good.  Now, I'm sure that this is probably just a phase that I will outgrow.  However, the following day I read a post on The Healthy Apron called "Meat-Less May."  I was really intrigued to learn that a lot of people are going to try eating vegetarian either partially or completely for the month of May.

Do I dare say I might do it??  I am very curious at how hard it will be.  Will my body will start to crave meat or will I accustom to a meat-less diet?  And how will my body feel?  I know that if vegetarians do not cleverly plan their diets, they can be at risk for low protein and iron intakes.  I will definitely have to get my protein and iron from other  foods like milk and nuts and iron-supplemented cereal.  


I am very interested in this meat-less May idea and am going to do it!  Do you dare try it as well?

Start with this Veggie Quesadilla recipe and you'll find that meat-less cooking is: a) inexpensive, b) delicious, and c) healthy!

Veggie Quesadillas
from Favorite Family Recipes

1 c. frozen corn
1 c. grated zucchini (juices squeezed out)
1/2 bunch cilantro, chopped
2 Tbsp. diced jalapeno (or more if you like it hot)
1 can black beans, drained and rinsed
1/2 tsp. salt
1/4 tsp. pepper
1-2 tsp. chili powder
1/2 tsp. cumin
2 c. Monterey Jack cheese (or cheddar or Mexican blend), shredded
flour tortillas (I recommend whole-wheat tortillas)

In a large bowl, combine all ingredients except for the cheese (and tortillas of course). Place mixture in a large skillet and fry until hot. In the meantime, heat a medium-sized skillet over medium heat. Place a tortilla in the pan. On half of the tortilla add a few large scoops of the corn/bean mixture and a little cheese. Fold tortilla over, then flip sides. When cheese is melted, cut in half and serve!

Sunday, April 17, 2011

Zucchini Bake with Feta and Thyme

As much I wish weren't true, I'm not a HUGE veggie lover.  Don't get me wrong, I really like potatoes, and corn and carrots and snap peas and just about most other veggies.  But I don't completely LOVE them.  I don't crave them, you know?

I especially don't like cucumbers or zucchinis.  Funny how the name of this post is zucchini, yeah?

Well, this recipe that I found at Real Mom Kitchen pretty much changed my mind!
The soft, baked zucchini and yellow summer squash taste delicious with the savory herbs and feta cheese.  I will definitely make this again!

Zucchini Bake with Feta and Thyme

  • 4 medium-sized zucchini, or a mixture of zucchini with yellow squash, sliced lengthwise and then into 1/4 inch slices (about 8 cups sliced squash)
  • 1 T olive oil (or less, depending on the pan)
  • 1 T minced garlic
  • 2 large eggs
  • 1/3 cup light sour cream
  • 1 cup crumbled feta (not tightly packed)
  • 1/2  T dried thyme
  • 2 T grated Parmesan cheese
  • 1 T lemon juice
  • salt and fresh ground black pepper to taste
  1. Preheat oven to 375 degrees. Wash and dry squash, then cut off stem and blossom end and discard. Cut squash lengthwise in half, then slice into half-moon slices about 1/4 inch thick. (Kayln used a mandoline with a 7mm blade, but I just used a knife.)
  2. Heat olive oil in large non-stick frying pan, add garlic and saute about 45 seconds (just long enough to season the oil, don’t let the garlic brown.) Add squash slices and saute about 4 minutes, turning a few times. Squash should be barely starting to soften.
  3. While squash cooks, break eggs into a small bowl or glass measuring cup and beat until egg yolks and whites are combined. Stir in sour cream, feta, thyme,  Parmesan, and lemon juice.
  4. Spray a 2 quart gratin dish or glass casserole dish with non-stick spray or olive oil. Layer half the squash in the dish, then season with salt and fresh ground black pepper. (Remember the feta is salty, so it won’t need a lot of salt.) Pour over half the egg-feta mixture and use the back of a spoon or a rubber scraper to spread it over the squash. Repeat with another layer of squash and the rest of the feta-egg mixture.
  5. Bake at 375 degrees for 40-45 minutes, or until the mixture is bubbling, slightly set, and top if lightly browned. Serve hot. Makes 6 side dish servings.

Monday, October 11, 2010

Spaghetti Squash Marinara

You know what? Sometimes life gets really busy.  And I'm sorry that it has to be that way.  But if it wasn't, well, then... I might have more time to blog.

I think its all about... oh yeah- prioritizing?  Yeah.  First things first.  Well today is a first.  Not only am I actually being diligent and posting, but I am posting a recipe that I made TODAY.  As in a few hours ago! It is still in my stomach as I type.


I've never tried spaghetti squash before, but only heard pretty good things about it.  It's literally shaped like thin, noodley strands that resemble spaghetti!  I approve of anything resembling spaghetti and this is no exception.  Super easy, very healthy, and incredibly yummy. It tastes just like pasta! That's all I have to say about it, other than you should make this.


Spaghetti Squash Marinara


1 large spaghetti squash
1 cup marinara sauce
1/2 cup minced fresh parsley (or 1 tsp. dried)
1/2 cup grated Parmesan cheese (I used shredded Italian cheese)
salt and pepper

Preheat the oven to 400.  Use a large, sharp knife to cut the squash in half.  Scoop out the seeds and place the squash halves facedown on a lightly greased baking sheet.  Bake for 35-45 minutes, until the shells are tender enough that you can pierce them easily with a fork.  Remove the squash from the oven and lower the oven temperature to 350.  With a fork, scrape the squash strands from the shells into a large bowl.  Mix with the sauce, parsley, and about two-thirds of the cheese.  Season with salt and pepper.  Place the mixture in a casserole dish, sprinkle with remaining cheese on top, and bake for 15-20 minutes, until the squash mixture is heated through and the cheese topping is golden brown.

Makes 4 servings

Nutrition per serving: 90 calories, 3.5g fat, 3g fiber, 11g protein, 11g carbohydrate

Tuesday, September 28, 2010

Honey Glazed Carrots

My first memory of steamed/cooked/soft, yummy carrots is of my mom's weekly Sunday roast dinner.  Ever since I can remember, a juicy rump roast with potatoes and carrots aromatically simmered in the crock pot all Sunday morning and into the afternoon when we returned from church.  

The simple crock-pot meal is still today a family favorite. I mean, it's just pure comfort food!

These carrots reminded me a tad of the large cooked carrot halves my mom threw in with the roast; soft and tender and juicy.  Dare I say, however, that these glazed carrots are even better??


They are SO simple to whip up in five minutes and are a great way to jazz up your daily vegetable intake.  YUM!


Honey Glazed Carrots
1/4 cup water
3 cups chopped carrots (or baby carrots)
1 tsp butter
1 Tbsp honey
nutmeg to taste

In medium saucepan, bring the water to a boil.  Add the carrots and cook, covered, over medium heat for 10-15 minutes, until the carrots are tender.  Drain.  Add the honey and butter to the hot saucepan, and stir until they are melted together.  Add the carrots and gently toss.  Sprinkle with nutmeg.  

*Carrots can also be cooked in the microwave.  Cooking times will vary.

Wednesday, June 23, 2010

Garlicky Pasta with Tomatoes & Basil


My grandpa was an Italian cook.  I'm not sure how much of his cooking skills I inherited, but one thing I have heard is that he was a big fan of garlic.  According to him, you can never have too much of it.  This recipe calls for 3 cloves per recipe, and since I doubled it, that would mean 6.  But, I listened to my inner-Italian and decided to add a few more cloves- just for good measure!  The result was not disappointing; my whole family loved this.  My mom said that it was good enough to be served at a restaurant.  It is a light and healthy dish that calls for a lot of tomatoes but it has an intense, explosive flavor! Yum yum yum!!


Garlicky Pasta with Tomatoes and Basil
from MyRecipes.com
Yield: 6 (1 1/3 c.) servings 

3 Tbsp. extra-virgin olive oil
3 garlic cloves, minced (can add a couple more if you like a good garlic flavor)
5 cups chopped plum (Roma) tomatoes (about 2 pounds)
6 cups hot cooked bowtie pasta (about 12 ounces uncooked pasta)
1/3 cup chopped fresh basil or 2 Tbsp. dried basil
1/4 cup (1 ounce) grated fresh Parmesan cheese
1 1/2 tsp. salt
1/4 tsp. black pepper 

Heat olive oil in a large Dutch oven over medium-high heat. Add minced garlic; sauté 30 seconds. Add chopped tomatoes; cook for 2 minutes or until thoroughly heated, stirring occasionally. Add pasta, basil, cheese, salt, and pepper, tossing gently to combine.

Sunday, April 18, 2010

Brown Sugar-Baked Acorn Squash

My mom made us eat our veggies growing up, but they mostly consisted of potatoes, corn, carrots, salad... you know, the kid-friendly foods that moms repeatedly use to get their kids to get their nutrients.  Nope, Mom never made squash for us, in fact if you had asked me what that was, I would probably have confused it with cauliflower or some other unfamiliar veggie.


Well, you see, at college, my good friend, McKenzie, and I, occasionally cook dinners together.  She introduced me to this seemingly bland and boring vegetable.. which I quickly changed my disposition of it to be a delicious, sweet, nutrient-powerhouse!

There are several kinds of squash; so far, I have tried acorn, butternut, and yellow squash.  Although all are delicious, my favorite is definitely acorn!

Here is a no-fail, delicious recipe that will completely change your mind about squash.....  I made this for my family and all of my younger siblings wanted seconds.  Yes, it is that good.  And super simple, and healthy!  Plus squash is loaded with nutritents and fairly low in calorie.


Brown Sugar-Baked Acorn Squash


whole acorn squashes (number depends on how many servings you want- 1 squash can usually feed two people)
brown sugar
cinnamon
butter (if desired)
maple Syrup (if desired)

Preheat oven to 350 degrees.  With a fork, poke several holes in each squash.  Place in the microwave for 1-2 minutes to soften the thick core.  Then, with a large butcher knife, slice each squash in half and remove the seeds with a spoon.  Prepare a baking dish with about a 1/2- 1 inch of water in the bottom.  Place the squash halves in the dish, cut side down, and bake for 30 minutes.  Remove dish and pour out the water.  Add brown sugar and cinnamon into the center of each half (if you want, butter the insides before adding sugar) and bake, center side up, for 20 more minutes.  Remove, cool, add syrup and/or more brown sugar if desired, then enjoy with a spoon! 


Related Posts Plugin for WordPress, Blogger...