CLICK HERE FOR FREE BLOGGER TEMPLATES, LINK BUTTONS AND MORE! »
Showing posts with label dessert. Show all posts

Thursday, April 25, 2013

PERFECT Sugar Cookies


Let's talk about SUGAR COOKIES.  Okay so growing up my mom made sugar cookie cut-outs for just about every holiday- ALWAYS Halloween though, and USUALLY every Easter as well.  It is a fun tradition that I want to continue in my family.  I remember gathering around the table with my brothers and sister and decorating the baked and cooled cookie shapes with colored frosting and holiday-themed sprinkles.  The cookies my mom made were very good, in fact I'd make them again and again with no second thought if it weren't for this other cookie recipe.  This "other" cookie recipe is the recipe of my sister-in-law, Annie.  She has made them a couple times and brought them to family gatherings.  They are ah-mazzzzing.  Super thick, not dry at all (perfect moistness), and so so soft with a thick, creamy frosting that sets up beautifully. They remind me of the store-bought sugar cookies with thick frosting and sprinkles that everyone is obsessed about. Except better. I wanted to try making them myself to see if they would taste as good as hers... and they definitely did!  Wow... this is my go-to sugar cookie recipe now forever! So yeah you should try them out!


Perfect, Thick Sugar Cookie Cut-Outs
Yield: about 2 dozen

1 cup unsalted butter (I used salted though and it was fine)
2 cups sugar
2 eggs
1/2 cup sour cream
1 tsp. vanilla
1/2 tsp. baking soda
2 tsp. baking powder
4 1/2 cups flour
1/2 tsp. salt
Preheat oven to 350 degrees F.  Cream butter and sugar together. Add eggs, one at a time, mixing after each one.  Add sour cream and vanilla and mix.  Mix dry ingredients in a separate bowl.  Add 1 cup at a time to batter.  Chill dough for 1 hour.  Roll out thick on floured surface (1/4 inch).  Cut into desired shapes and place on baking sheet that has been sprayed with cooking spray.  Bake for 8-10 minutes.  Wait until completely cool to frost.

Frosting:
1/2 cup butter (1 stick)
1 tsp. vanilla
3-4 cups powdered sugar
1/4 cup milk
Mix all ingredients together using an electric mixer.

Double Chocolate Chip Cookies and Mint Chip Ice Cream Sandwich


These lovelies are basically to-die for. First you start off with the most fudgey, chocolatey cookies on the planet. Seriously I'm in love with these Double Chocolate Cookies from the Let's Dish recipes blog. I've made them several times, and they always turn out.  Although I've found that the recipe requires a little more flour- I use 2 1/2 cups instead of 2 cups and bake them for 10 minutes at least. I tried 8-9 and it was not enough, they were a little gooey, but still awesome!

Directions:
So, basically make the above cookies (follow the link to the blog). Eat the dough and eat a bunch of cookies before you realize you only have a dozen left to make ice cream sandwiches with.  Then whip out some mint ice cream (I used Dreyer's Mint Cookie Crunch) and soften it in the microwave for about 30 seconds. (You could leave it on the counter for 10 minutes or so but I did not think ahead and was not patient enough to wait).  Then take a big dollop of ice cream and place it on one cookie, and then sandwich it with another.  Press down gently so that the ice cream flattens out, and use the back of a spoon to evenly spread the ice cream between the two cookies.  It doesn't have to be perfect.  In fact mine were pretty messy. Doesn't affect the taste! Then wrap in a piece of aluminum foil. (It helps if you tear a bunch of pieces of foil off before starting the process, as then you don't have to tear each one off with your messy, ice-cream fingers.) Place each cookie directly into the freezer after wrapping. Let freeze for a few hours until solid, then eat straight from the freezer!
I love these so much. I'm so excited to make different cookie/ice cream combinations... chocolate chip cookie and vanilla or chocolate or strawberry ice cream, peanut butter cookie and chocolate or Reeses ice cream... ah there's so many possibilities! Love.


Tuesday, April 23, 2013

The BEST Chocolate Cake


So the picture is really blurry (I KNOW- I want a better camera so bad...) but I'm gonna keep this super short n' sweet. (Just like I said in my last post- ha)  This is the BEST CHOCOLATE CAKE you will ever eat! Hands down, most definitely the richest, and fudgiest and most chocolatey cake on this earth!
I know you may not believe me, but TRUST me! At first when I saw the post on Kevin & Amanda I wasn't sure whether I should believe it...

But after seeing this batter and sticking my finger in it trying it with a spoon, I was not the least bit skeptical anymore.

The batter is so thick and chocolatey and tastes amazing. And the cake is even better. Here is my cake after I frosted it... (my first time frosting a cake, by the way...)

The frosting is homemade too- Buttercream frosting and it is fabulous on this cake.  I would say you need to make the frosting if you're gonna make the cake.
And yes, I made this for my Mom.  Not for Mother's Day as you would assume, but actually for her birthday, which was the week before!

And here she is blowing out the candles!  She's so cute, and only 41! I love her :)


The Best Chocolate Cake Ever
 

1 box devil’s food cake mix
1 small pkg Jello instant chocolate pudding mix
1 cup sour cream
1 cup vegetable oil
4 eggs, beaten
1/2 cup milk
1 tsp vanilla
2 cups mini chocolate chips
Preheat oven to 350 degrees F. In a very large bowl, mix together everything except chocolate chips. Batter will be thick. Stir in the chocolate chips. Pour batter into cake pan of choice (I normally use two 9-inch pie pans). For cooking time, I use the cooking times on the back of the devil’s food cake box as a guide and usually add 10 mins to whatever it says. Then I do the toothpick check, and if it’s not done, I check on it every 5 mins after that. It usually takes around 45 mins for two, 9-inch pie pans.

Buttercream Frosting
1 cup shortening (Crisco)
4 cups powdered sugar
1/4 tsp salt
1 tsp vanilla extract
1/3 cup heavy whipping cream
In a mixing bowl, cream shortening until fluffy. Add sugar and continue creaming until well blended. Add salt, vanilla, and whipping cream. Blend on low speed until moistened. Beat at high speed until frosting is fluffy.

Saturday, January 19, 2013

Pomegranate Cheesecake

Have I mentioned that I love to bake cheesecakes?  No?  Well, okay I'll admit I've only made I think 4 cheesecakes in my entire life, and 2 of them were the same recipe (which was this FABULOUS lemon cheesecake on my blog- it is to die for!)

But, since cheesecake is one of my favorite desserts evah, I really think I've found my niche in baking.  I mean who doesn't love to make something from scratch into a beautiful, aril-speckled pomegranate cheesecake like below?


And then you get to eat it for like 4 days in a row because only your husband and you live at home and even though you brought it to Sunday dinner you still somehow left with half of a cheesecake leftover.  What's a girl to do??

This was a fab recipe that I made over the holidays- New Year's Eve to be exact- but really would be perfect at this time of year still since pomegranates are at their peak (I think? Don't quote me on that- at least I'm still seeing them in stores and all over grocery ads these days).  

Boy oh boy do I love cheesecake! I have another recipe that I made last November that I will post soon... even though it's a recipe for a pumpkin cheesecake (with white chocolate and a gingersnap-pecan crust and a caramel drizzle-= drool) I just simply do not care and think that pumpkin tastes just as good in January as it does in November.  

Anyway without further adieu...


POMEGRANATE CHEESECAKE
adapted from Mel's Kitchen Cafe

*Plan ahead as the cheesecake needs to be refrigerated at least for 4 hours or overnight.

INGREDIENTS:

Crust:
1/2 cup butter, softened
1/4 cup packed brown sugar
1 egg
1 1/4 cups all purpose flour

Filling:
4 8-oz. packages reduced-fat cream cheese, softened
1 1/4 cups granulated sugar
1/4 cup all purpose flour
3 eggs
1 tablespoon vanilla
1/2 cup reduced fat sour cream
1 teaspoon finely shredded lemon peel
3/4 cup pomegranate seeds

Topping:
1 1/2 cups reduced fat sour cream
1/4 cup sugar
1 teaspoon vanilla

Pomegranate Glaze:
1-16-ounce bottle pomegranate juice (usually found in the refrigerated section of juices)
1/4 cup brown sugar
1 1/2 tablespoons cornstarch
1/2 cup pomegranate seeds (tutorial on de-seeding here)

DIRECTIONS:
For the crust: preheat oven to 350 degrees. In a mixing bowl beat butter on medium high speed for 30 seconds. Add brown sugar. Beat until combined. Add egg; beat well. Beat in flour until combined. Divide dough in half. Cover one portion and set it aside.

Remove the sides from a 10-inch springform pan and set aside. Spread first portion of dough on just the bottom of ungreased springform pan base, spreading dough to edges. Place on baking sheet. Bake for 10 minutes. Cool completely. When cool, attach sides of pan. Press chilled dough onto the sides of the sprinform pan to a height of 1-3/4 inches, using a thin metal spatula, like an offset spatula, to spread dough.

For the filling: reduce oven temperature to 325 degrees. In an extra-large mixing bowl beat cream cheese and sugar until fluffy. Beat in the flour on low speed until smooth. Add eggs and vanilla all at once, beating on low speed just until combined. Mix in sour cream and lemon peel. Then, using a wooden spoon or a spatula, gently fold in pomegranate seeds (if you use the electric mixer for this part, the seeds will burst and stain the filling with the juice – and it won’t look as pretty).
Pour filling into crust-lined pan. Place on baking sheet. Bake for 65 minutes or until edges are puffed and center jiggles slightly when gently shaken. Remove from oven. (It doesn’t matter if the cheesecake cracks on top since it will have a sour cream topping.)

For the topping: stir together sour cream, sugar, and vanilla. Spread sour cream mixture over top of baked cheesecake, spreading gently to the edges. Return to oven; bake for 10 minutes. Remove from oven. Cool on wire rack for 15 minutes. Loosen crust from sides of pan. Cool for 30 minutes more. Remove sides of pan; cool completely. Cover; chill 4 hours or overnight.

For pomegranate glaze: in a medium saucepan bring pomegranate juice to boiling; reduce heat and boil gently, uncovered, until reduced to 1 cup (12 to 15 minutes). In a separate bowl, stir together brown sugar and cornstarch. Add to juice. Cook and stir until thickened and bubbly. Cook and stir 2 minutes more. Transfer to a medium bowl; cover surface with clear plastic wrap. Cool to room temperature. Store, covered, in refrigerator until serving time.

When ready to serve, remove cheesecake and pomegranate glaze from refrigerator 15 minutes before serving. Spoon some sauce over top of cheesecake; pile remaining pomegranate seeds in center of cheesecake. To serve, slice cheesecake. Pass remaining sauce. Makes 16 servings.

Monday, March 26, 2012

Cranberry Cream Cheese Bars


I actually made these around Christmastime last year and have just not gotten around to posting them! But I made this recipe that I found in a Land O' Lakes recipe magazine on my our annual "bake day" and they were really yummy! Cranberry and orange blend beautifully together, that's for sure!

Cranberry Cream Cheese Bars

Crust:

1/2 cup butter softened
1/2 cup firmly packed brown sugar
1 cup all-purpose flour
1/2 cup uncooked quick-cooking oats
1 teaspoon freshly grated orange zest
1 cup mini real semi-sweet chocolate chips
3/4 cup sweetened dried cranberries, chopped
 
Filling:
4 ounces cream cheese, softened
1/2 cup sugar
1/3 cup whipping cream
1 teaspoon vanilla
 Heat oven to 350°F. Spray 8-inch square baking pan with no-stick cooking spray; set aside.

Combine butter and brown sugar in large bowl; beat at medium speed until creamy. Reduce speed to low; add flour, oats and orange zest. Beat until mixture resembles coarse crumbs. Stir in chocolate chips and cranberries. Reserve 1 cup crumb mixture.

Firmly press remaining crumb mixture into bottom of prepared pan. Bake 10 minutes.

Meanwhile, combine cream cheese and sugar in medium bowl. Beat at medium speed until smooth. Add whipping cream and vanilla, beat until smooth.

Pour cream cheese mixture evenly over hot, partially baked crust. Sprinkle reserved crumb mixture gently over filling. Continue baking for 27 to 30 minutes or until edges are light golden brown. Cool completely; cut into bars. Store refrigerated.

Wednesday, February 29, 2012

Skinny, Delicious Chocolate Chip Cookies!

So even though I'd like to say that every low-fat, "lightened" recipe that I've made has been delicious and just as good as its "original" version.... that is just not the case.

Don't get me wrong... there are plenty of healthy, low-fat and YUMMY recipes out there. And some of them are on my blog ;)!

Well let me tell you, friends... this recipe for low-fat chocolate chip cookies is A-MAZING. Phenomenal. Almost better than my go-to recipe for chocolate chip cookies. I got them from the blog www.skinnytaste.com and she even describes them as the BEST low-fat cookies! They have half whole-wheat flour and only 2 tablespoons of butter in the whole batch!

I dare you to make these, folks. Make 'em and feed them to someone you love... see if they can tell any difference. I doubt they'll be able to! The only thing I would do differently is spray a little more cooking spray on the baking sheets as the cookies were a little fragile after cooling for a few minutes and several broke apart as I was trying to transfer them from the sheet. So use plenty of Pam or as the recipe recommends, use silicone baking mats (I didn't have any). After cooling though, these cookies have just the right texture and form. Delicioso!!


Skinny Low-fat Chocolate Chip Cookies
Gina's Weight Watcher Recipes
Servings: 12 • Size: 2 cookies • Old Points: 4 pts • Points+: 5 pts
Calories: 170.7 • Fat: 5.0 g • Protein: 1.4 g • Carb: 34.5 g • Fiber: 1.4 g • Sugar: 25.4 g
Sodium: 113.1 mg

Ingredients:
1/2 cup granulated sugar
1/2 cup brown sugar
2 tbsp butter, melted
1 egg white
2 tbsp apple sauce
1 tsp vanilla extract
1/2 cup whole wheat pastry flour
1/2 cup all purpose flour
1/4 tsp baking soda
1/8 tsp salt
1/2 cup mini chocolate chips

Directions:

Preheat oven to 350°. Line two cookie sheets with non-stick silicone baking liners such as Silpats (I highly recommend for best results) or lightly spray cookie sheets with cooking spray.

In a large bowl, combine the flour, baking soda and salt and stir to blend. In another bowl, whisk the sugars, butter, egg white, applesauce and vanilla together until light and fluffy.

Whisk the dry ingredients into the wet ingredients in two additions until the batter is very well blended. If the batter looks more “crumbly” than smooth, add just a drop of water at a time (ONLY if needed) until it smooths out.

Fold in chocolate chips.

Drop by level spoonfuls about 1 inch apart onto baking sheets.

Bake 8 - 10 minutes. Remove from the oven, and let them stand 5 minutes before removing the cookies from the pans to cool on wire racks.

Makes 2 dozen cookies.
Adapted from Cooking Done Light.

Tuesday, December 20, 2011

Cranberry-Orange Bread

This may well qualify as the WORST picture I have on this blog.  Oh my goodness I should just take it off.  You see, this bread gave me a little bit of trouble last week.  First time making this recipe of my grandmother's.  Instead of putting the bread in a large loaf pan, I poured it into two small loaf pans.  The batter was JUST about gone when the two pans were about full.  I knew I shouldn't pour any more batter into them, but it just didn't seem like I had enough to fill a third pan!!

Silly me.  They definitely over-flowed.  All over the oven racks and oven floor.  Luckily I noticed it before any real damage was done and put a baking sheet on the bottom rack to catch any remaining drippings.  Hence, the lack of this bread's beauty.  

BUT, it did not matter.  This is my new favorite bread.  Ever. It is SO good.  So incredibly moist and flavorful.  The orange juice and cranberries compliment each other so well! My family and hubby also raved about it.  Wow.  I want to make it again right now.  New. Favorite. Recipe.  Just make sure you don't over-fill the pans.  Yup.

Cranberry-Orange Bread
 recipe courtesy of my grandmother

2 cups flour
1 3/4 c. sugar
1 1/2 tsp. baking powder
1 tsp. salt
1/2 tsp. baking soda
1 egg, beaten
3/4 cup orange juice
1/2 cup oil (I used vegetable)
1 cup fresh cranberries, chopped
1/2 cup walnuts, chopped
1 tsp. grated orange peel

Preheat oven to 350.  Sift or finely mix together the flour, sugar, baking powder, salt, and baking soda.  Set aside.  In separate bowl, combine beaten egg, orange juice and oil.  Add to dry ingredients, stirring until moistened.  Stir in cranberries, walnuts and orange peel.  Bake in greased 9x5x3 pan for 50 minutes or until done.

Monday, November 21, 2011

Warm Apple-Buttermilk Custard Pie


So guess what.  Yesterday was my 100th post! Took me long enough ;) but I thought that was a pretty cool accomplishment!

Well.  I have one last pie recipe for you before you finalize your Thanksgiving plans and before you stuff your face on Turkey Day in three days.  Wait that's not just me, is it?  This is really a goodie.  Everyone who tried it said they loved it and that it was better than normal apple pie.  How is it different, you ask?  It's got a creamy, buttermilk custard filling that surrounds the sweet, cinnamon-sugar apple filling and is topped with a crumbly, buttery and sugary topping.  Did that do it for you?  :)

Warm Apple-Buttermilk Custard Pie
from Cooking Light

Crust:
  • 1/2 (15-ounce) package refrigerated pie dough or refrigerated pie crust (such as Pillsbury)
  • Cooking spray  
Streusel:
  • 1/3 cup all purpose flour 
  • 1/3 cup packed brown sugar 
  • 1/2 teaspoon ground cinnamon 
  • 2 1/2 tablespoons chilled butter, cut into small pieces 
Filling:
  • 5 cups sliced peeled Granny Smith apple (about 2 pounds) 
  • 1 cup granulated sugar, divided 
  • 1/2 teaspoon ground cinnamon 
  • 2 tablespoons all-purpose flour 
  • 1/4 teaspoon salt 
  • 3 large eggs 
  • 1 3/4 cups fat-free buttermilk
  • 1 teaspoon vanilla extract 
  • Preheat oven to 325º.
  • To prepare crust, roll dough into a 14-inch circle; fit into a 9-inch deepdish pie plate coated with cooking spray. Fold edges under; flute. Place pie plate in refrigerator until ready to use.
  • To prepare streusel, lightly spoon 1/3 cup flour into a dry measuring cup; level with a knife. Combine 1/3 cup flour, brown sugar, and 1/2 teaspoon cinnamon in a medium bowl; cut in butter with a pastry blender or 2 knives until the mixture resembles coarse meal. Place streusel in refrigerator.
  • To prepare the filling, heat a large nonstrick skillet coated with cookig spray over medium heat. Add sliced apple, 1/4 cup granulated sugar, and 1/2 teaspoon cinnamon; cook 10 minutes or until the apple is tender, sitrring mixture occasionally. Spoon the apple mixture into prepared crust.
  • Combine remaining 3/4 cup granulated sugar, 2 tablespoons flour, salt, and eggs, stirring with a whisk. Stir in buttermilk and vanilla. Pour over apple mixture. Bake at 325º for 30 minutes. Reduce oven temperature to 300º (do not remove pie from oven); sprinkle streusel over pie. Bake at 300º for 40 minutes or until set. Let stand 1 hour before serving.

Sunday, November 20, 2011

Maple-Walnut Pumpkin Pie


With Thanksgiving just four days away, it's likely you already have your menu planned out. I don't blame you... I started planning for Thanksgiving about a month ago... and it's not like I'm having it at my house or anything.  Nope I'm just bringing some side dishes along to my parent's dinner AND my in-laws dinner.  Yup we're so lucky to have both of our families within 10 minutes of our home... it means Thanksgiving times two! My husband surprisingly considers this a bad thing, since he doesn't know how to eat small portions at the first dinner, ends up stuffing himself at both dinners and then regrets it.  Typical men.  I, on the other hand, am excited.  Hopefully I can eat small portions... but no promises, I mean it IS Thanksgiving! ;)

If you happen to be looking for a pumpkin pie recipe, this one really is special.  Not your average pumpkin pie, this recipe has a walnut streusel on top that is really delicious and adds to the wow-factor of this pie! I'd be making it again this Thursday if my mom wasn't already gonna make the pies.  

Maple-Walnut Pumpkin Pie

Crust:
1 box Pillsbury® refrigerated pie crusts, softened as directed on box
Filling
1 can (15 oz) pumpkin (not pumpkin pie mix)
1 can (14 oz) sweetened condensed milk (not evaporated)
2 eggs
2 tablespoons real maple syrup or maple-flavored syrup
1 1/2 teaspoons pumpkin pie spice
Streusel:
1/4 cup packed brown sugar
1/4 cup finely chopped walnuts
2 tablespoons all-purpose flour
2 tablespoons cold butter or margarine
Topping: (I just used Cool Whip instead)
1 cup whipping cream
2 tablespoons packed brown sugar
Chopped walnuts, if desired
1. Heat oven to 425°F. Place pie crust in 9-inch glass pie plate as directed on box for One-Crust Filled Pie. In large bowl, beat filling ingredients with electric mixer on medium speed until smooth. Pour into crust-lined pan. Bake 10 minutes.  
2. Meanwhile, in small bowl, mix 1/4 cup brown sugar, the chopped walnuts and flour; cut in butter until crumbly. Set aside. 
3. Reduce oven temperature to 350°F. Sprinkle streusel over pie. Cover crust edge with 3-inch-wide strips of foil to prevent excessive browning.  
4. Bake 30 to 35 minutes longer or until knife inserted 1 inch from edge comes out clean. Cool completely, about 2 hours. Serve or refrigerate until serving time. 
.5 To serve, in medium bowl, beat whipping cream and 2 tablespoons brown sugar with electric mixer on medium-high speed until soft peaks form. Serve pie with whipped cream; garnish with chopped walnuts. Store in refrigerator.

Tuesday, November 8, 2011

Caramel-Apple Bread Pudding

Never did you see a treat so versatile (dessert, brunch, breakfast, snack...) yet so festive and appropriate (full-swing Fall and Thanksgiving preparations, anyone?)


Although it looks pretty with the ice cream, I think I preferred this sans a la mode and JUST with the dreamy, decadent BUTTERMILK SYRUP from Our Best Bites.  Oh my gosh it was caramel-apple heaven.  Just do it.  I think this would make a perfect Thanksgiving breakfast.  A "pre-gorge-yourself" kind of meal that, at the same time, sets the stage for a day that is only appropriate when it includes all-out, decadent, comfort foods.  Yes, this fits the bill.


Caramel Apple Bread Pudding

5-6 c. stale French bread cubes (about 1/2 of a standard loaf cut into 1″ cubes)
3 c. apples, peeled and chopped into small pieces
4 eggs
3 egg yolks
1 1/2 c. milk
1 1/2 c. heavy cream
3/4 c. brown sugar
1/4 c. sugar
1/4 tsp. salt
1 tsp. vanilla extract
1 tsp. almond extract
2 tsp. pumpkin or apple pie seasoning
1 Tbsp. butter, chopped
*If possible, cut the bread into cubes and leave it out for several hours or overnight. If not, place the bread cubes on a baking sheet and bake for 10-15 minutes or until the bread cubes are dried out but not toasted.
Preheat oven to 350. Lightly grease or spray a 9×13″ baking dish with shortening or non-stick cooking spray.
In a large bowl, toss together the bread cubes and the apple pieces. Transfer to the baking dish. In the same large bowl, whisk together the remaining ingredients except for the butter. When combined, continue to whisk while pouring over the bread/apple mixture (just to make sure the spices are evenly distributed). Gently combine the bread and egg mixture, making sure each piece of bread is soaking in part of the egg and milk mixture. Allow to stand for at least 15 minutes (longer, if you can; you could even do this the night before, cover it tightly, and then bake it in the morning).
When the egg/milk mixture has mostly soaked into the bread, dab the butter over the bread and place the baking dish in the preheated oven and bake for 40-50 minutes or until the center is set but not dry or burned.
Remove from oven and allow to stand for 5 minutes. Cut into pieces and serve with warm Buttermilk Syrup (and vanilla ice cream if you really want to walk on the wild side.)

Monday, October 24, 2011

Low-fat Candy Corn Cupcakes

I LOVE Halloween and whenever it comes around I am always wanting to make fun, festive or spooky treats and food! This time of year can be so hard to eat healthy though. It seems like everywhere you go, you are tempted with candy, cookies, pie and treats galore! It's definitely not IMPOSSIBLE to eat healthy, though.

These cupcakes are actually Hungry Girl's recipe for Vanilla Cupcakes.  All I did to make them Halloween appropriate was divide the batter into two, dye one-half orange and other half yellow.  I layered each cupcake liner with half yellow batter, then orange.  You can't see it by this picture but it is really fun to bite into the cupcake and find a bright two-toned cupcake! And these may be guilt-free (164 calories and 3g fat per cupcake), but they are delicious!

HG's "Candy Corn" Cupcakes
recipe adapted from Hungry Girl

Ingredients:

For Frosting
1 1/4 cups Cool Whip Free, thawed
1 1/2 tbsp. Jell-O Sugar Free Fat Free Vanilla Instant Pudding Mix

For Cupcakes
Half of an 18.25-oz. box (about 1 1/2 cups) moist-style yellow cake mix
3/4 tsp. baking powder
1 cup Sprite Zero (or another diet lemon-lime soda), room temperature
1/2 tsp. vanilla extract
1/2 cup liquid egg whites or (about 4) raw egg whites
yellow food color
red food color

For Topping
candy corn
Halloween/fall colored sprinkles (optional)

Directions:
Preheat oven to 350 degrees.

To make the frosting, combine Cool Whip with pudding mix in a bowl, and mix until smooth. Cover and refrigerate until cupcakes are ready to be frosted.

In a large bowl, combine cake mix with baking powder and stir until free of lumps. Add soda and vanilla extract, and stir or whisk until batter is smooth. Set aside.

In a separate bowl, whip egg whites with a handheld electric mixer set to medium speed until fluffy, about 1 - 2 minutes. Gently mix egg whites into the cake batter until thoroughly combined.

Divide batter into two equal parts.  In one half, add 3-4 drops of yellow food color (or more if it needs it) and mix well.  In the other half, add a 1:3 ratio of red to yellow food color until you get the orange color that you like. (I think I did 2 drops red, 6 drops yellow- yikes!)

Line 9 cups of a 12-cup muffin pan with baking cups and/or spray with nonstick spray. Evenly distribute the yellow batter into the cups, then evenly distribute the orange batter on top of that.

Bake for 15 - 17 minutes, until a toothpick inserted into the center of a cupcake comes out fairly clean. Set aside and allow to cool completely.

Once cupcakes have cooled, top each evenly with the frosting and decorate with candy corn and/or sprinkles.

Nutriton: 164 calories per serving, 3g fat

Sunday, October 16, 2011

Apple Streusel Pie Bars

Apple Streusel Pie Bars. What could be a better fall dessert? Probably nothing, because these are amazing! I like apple pie, I would never turn it down, but this apple dessert had me swooning! I'm not sure how many pieces I ate... definitely more than I should've... :/ haha but you too will see how good these are if you make them! Definite keeper recipe! And so easy!

Apple Streusel Bars
 
SWEET PASTRY:

2 c. flour
1/2 c. sugar
1/2 tsp. baking powder
1/2 tsp. salt
1 c. real butter, softened (no substitutions!)
1 egg, beaten
 
APPLE FILLING:

1/2 c. white sugar
1/4 c. flour
1 tsp. cinnamon
4 c. (about 3 medium) sliced, peeled baking apples (I've used Granny Smith in the past, although this time around I used Gala and they were fabulous)
 
GLAZE:
2 c. powdered sugar
About 3 Tbsp. milk (whole milk is best)
1 tsp. almond extract
 
To prepare crust, mix flour, sugar, salt, and baking powder in a medium bowl. Cut in butter with a pastry blender or two knives until you have pea-sized crumbles. Gently mix in beaten egg.

Spray a 9x13 baking dish with non-stick cooking spray. Gently pat about 2/3 of the crumb mixture onto the bottom of the dish. Preheat oven to 350 and set aside.
To prepare apple filling, combine flour, sugar, and cinnamon. Toss with apples and spread apples out on prepared crust. Sprinkle reserved crust mixture over apples evenly and bake in preheated oven for 40 minutes. When finished, allow to cool completely.

To prepare glaze, whisk together powdered sugar, almond extract, and enough milk to achieve desired consistency. Place glaze in a Ziploc bag and cut off a very small portion of one of the corners. Drizzle glaze over cooled pastry and allow to harden (you can place it in the freezer to hurry things along). Cut into bars and serve.

Monday, October 3, 2011

Pumpkin Whoopie Pies


Yup it's THAAAT time again, finally! I'm so excited fall is here! (I know, this is about the 3rd or 4th post that I've said that.. but really, I'm so happy!) These babies (actually they were pretty ginormous) are fabulously fall-ish and so, so yummy! They definitely got me in the Autumn/Halloween mood.  I love baking with pumpkin, probably because you only can one time a year ;)

This recipe came from Brown-Eyed Bakers' blog and it is a keeper! I'd suggest making them smaller than you think is normal, as they will turn out perfect.  I made them a little too big. Definitely didn't hurt on the taste factor but they would've been cuter and a little less guilty if they were smaller!

Pumpkin Whoopie Pies with Maple Cream Cheese Frosting
Brown-Eyed Baker

Yield: About 4 dozen assembled whoopie pies (will vary depending on how large you make them)
Prep Time: 15 minutes | Bake Time: 10 to 12 minutes

For the Whoopie Pies:
3 cups all-purpose flour
2 tablespoons cinnamon
1 teaspoon baking powder
1 teaspoon baking soda
1 teaspoon salt
1 teaspoon ground ginger
½ teaspoon ground nutmeg
1 cup granulated sugar
1 cup dark brown sugar
1 cup canola or vegetable oil
3 cups chilled pumpkin puree (canned pumpkin)
2 eggs
1 teaspoon vanilla extract

For the Maple-Cream Cheese Filling:
3 cups powdered sugar
8 ounces cream cheese, at room temperature
4 ounces (½ cup) unsalted butter, at room temperature
3 tablespoons maple syrup
1 teaspoon vanilla extract

1. Preheat oven to 350 degrees F. Line baking sheets with parchment paper or a silicone baking mat.
2. In a large bowl, whisk together the flour, cinnamon, baking powder, baking soda, salt, ginger and nutmeg. Set aside.
3. In a separate bowl, whisk the granulated sugar, the dark brown sugar, and the oil together. Add the pumpkin puree and whisk to combine thoroughly. Add the eggs and vanilla and whisk until combined.
4. Gradually add the flour mixture to the pumpkin mixture and whisk until completely combined.
5. Use a small cookie scoop or a large spoon to drop a rounded, heaping tablespoon of the dough onto the prepared baking sheets, about 1 inch apart.
6. Bake for 10 to 12 minutes, making sure that the cookies are just starting to crack on top and a toothpick inserted into the center of a cookie comes out clean. The cookies should be firm when touched. Remove from the oven and let the cookies cool completely on a cooling rack.
7. To make the filling, beat the butter on medium speed until smooth with no visible lumps, about 3 minutes. Add the cream cheese and beat until smooth and combined, about 2 minutes. Add the powdered sugar a little at a time, then add the maple syrup and vanilla and beat until smooth.
8. To assemble the whoopie pies: Turn half of the cooled cookies upside down. Pipe or spoon the filling (about a tablespoon) onto that half. Place another cookie, flat side down, on top of the filling. Press down slightly so that the filling spread to the edges of the cookie. Repeat until all the cookies are used. Put the whoopie pies in the refrigerator for about 30 minutes to firm before serving. (They are also good room-temperature, though, too.)


Thursday, September 29, 2011

Strawberry and Cheesecake Ice Cream Layered Dessert

I am just a little excited to share this recipe with you today for a couple of reasons.

1. It was my sweet husband's birthday "cake" on his birthday a few weeks ago, and
2. This recipe is my own creation!!! It is probably the first recipe that I invented completely on my own, with inspiration from several sources.  I even searched google but I did not find a recipe that was exactly like this.  So this is a ONE AND ONLY recipe! And it is SO, SO good!

So here's how I was inspired: My husband loves the strawberry "cheesequake" blizzards from Dairy Queen but always complains how there are not enough cheesecake bites in the ice cream.  So when I asked him a few weeks before his birthday what kind of cake or dessert he wanted me to make for him, he suggested "strawberry cheesequake blizzards." HA.  Well I got to thinking- what if I could have strawberry cheesecake ice cream, but add in chunks of real cheesecake, layer it with strawberry sauce on top of a graham cracker crust and then top with a layer of cool whip and garnish with crushed graham crackers? And that is how the Strawberry Cheesecake Ice Cream Layered Pie was born! Or at least in my head :)

So I originally intended on making homemade ice cream but I ran out of time.  I had some pretty good substitutes:

I made two batches: one with Blue Bell's Strawberries and Homemade Vanilla ice cream, and one with  Kroger's "Private Selection" New York Style Cherry Cheesecake ice cream that I got at Fry's.  I unfortunately could not find a strawberry cheesecake ice cream! But, these substitutes were AWESOME.

So, for the cheesecake bites, I did a couple of things.  I first bought a frozen Sara Lee's cheesecake, intending to cut it into chunks.  UNTIL a couple days later I saw these at Walmart! Sara Lee cheesecake BITES!!! I bought two containers, one Original and one flavored Strawberry Cheesecake! How perfect! And these little babies are delicious! They are so dang good.  When I make this again, I think I will only buy these.

So here is where I am making it, and I have just topped the ice cream layer with cheesecake bites, strawberry sauce and graham cracker crumbs. Mmm :)
Here is it finished.  Doesn't look too impressive from the top.... but when you cut a piece...


It's beautiful!!! And SO good! My husband loved, loved his birthday "cake." Both flavors were very, very good but overall I think we liked the cherry cheesecake kind better.  It tasted more "cheesecakey."  We had a TON of leftovers but it sure enough got eaten over the course of a week or two... :)
Strawberry and Cheesecake Ice Cream Layered Dessert
Yields: one 9x13 pan

1 half gallon strawberry (or cherry) cheesecake ice cream
2 containers of Sara Lee cheesecake bites in original or strawberry cheesecake flavor (or 1/2 frozen cheesecake cut into small, bite-sized pieces)
3 cups graham crackers, crushed
1/2 cup sugar
1/2 cup butter, melted
1 small container Cool Whip
Optional: Strawberry sauce (see recipe below)

Prepare oven to 375 degrees F.  Take ice cream out of freezer to soften. To make graham cracker crust, blend 2 cups of graham cracker crumbs, sugar and butter in large bowl.  Press mixture firmly into a 9x13 pan.  Bake for 8 minutes.  Let cool.  

When crust is cool, make sure ice cream is soft enough to spread.  If it's not, microwave for about 30 second intervals, stirring in-between to get it nice and smooth.  Once it's ready, let the layering begin!
Layer half of the cheesecake bites, strawberry sauce and one-third of graham cracker crumbs over the cooled crust.  Then, spread half of the ice cream over the top.  Repeat process, with cheesecake, graham crackers and sauce, then the rest of the ice cream. Cover with aluminum foil and freeze for about an hour.  After an hour, take out and spread Cool Whip over top. (This is done so that it is easier to spread the Cool Whip rather than spreading it while the ice cream is very melty).  Finish by sprinkling remaining graham cracker crumbs on the top.  Cover and freeze for 3-4 hours more, or until completely frozen.

When ready to serve, let it sit out for about 15 minutes, allowing it to soften a bit.  And enjoy!


Friday, September 23, 2011

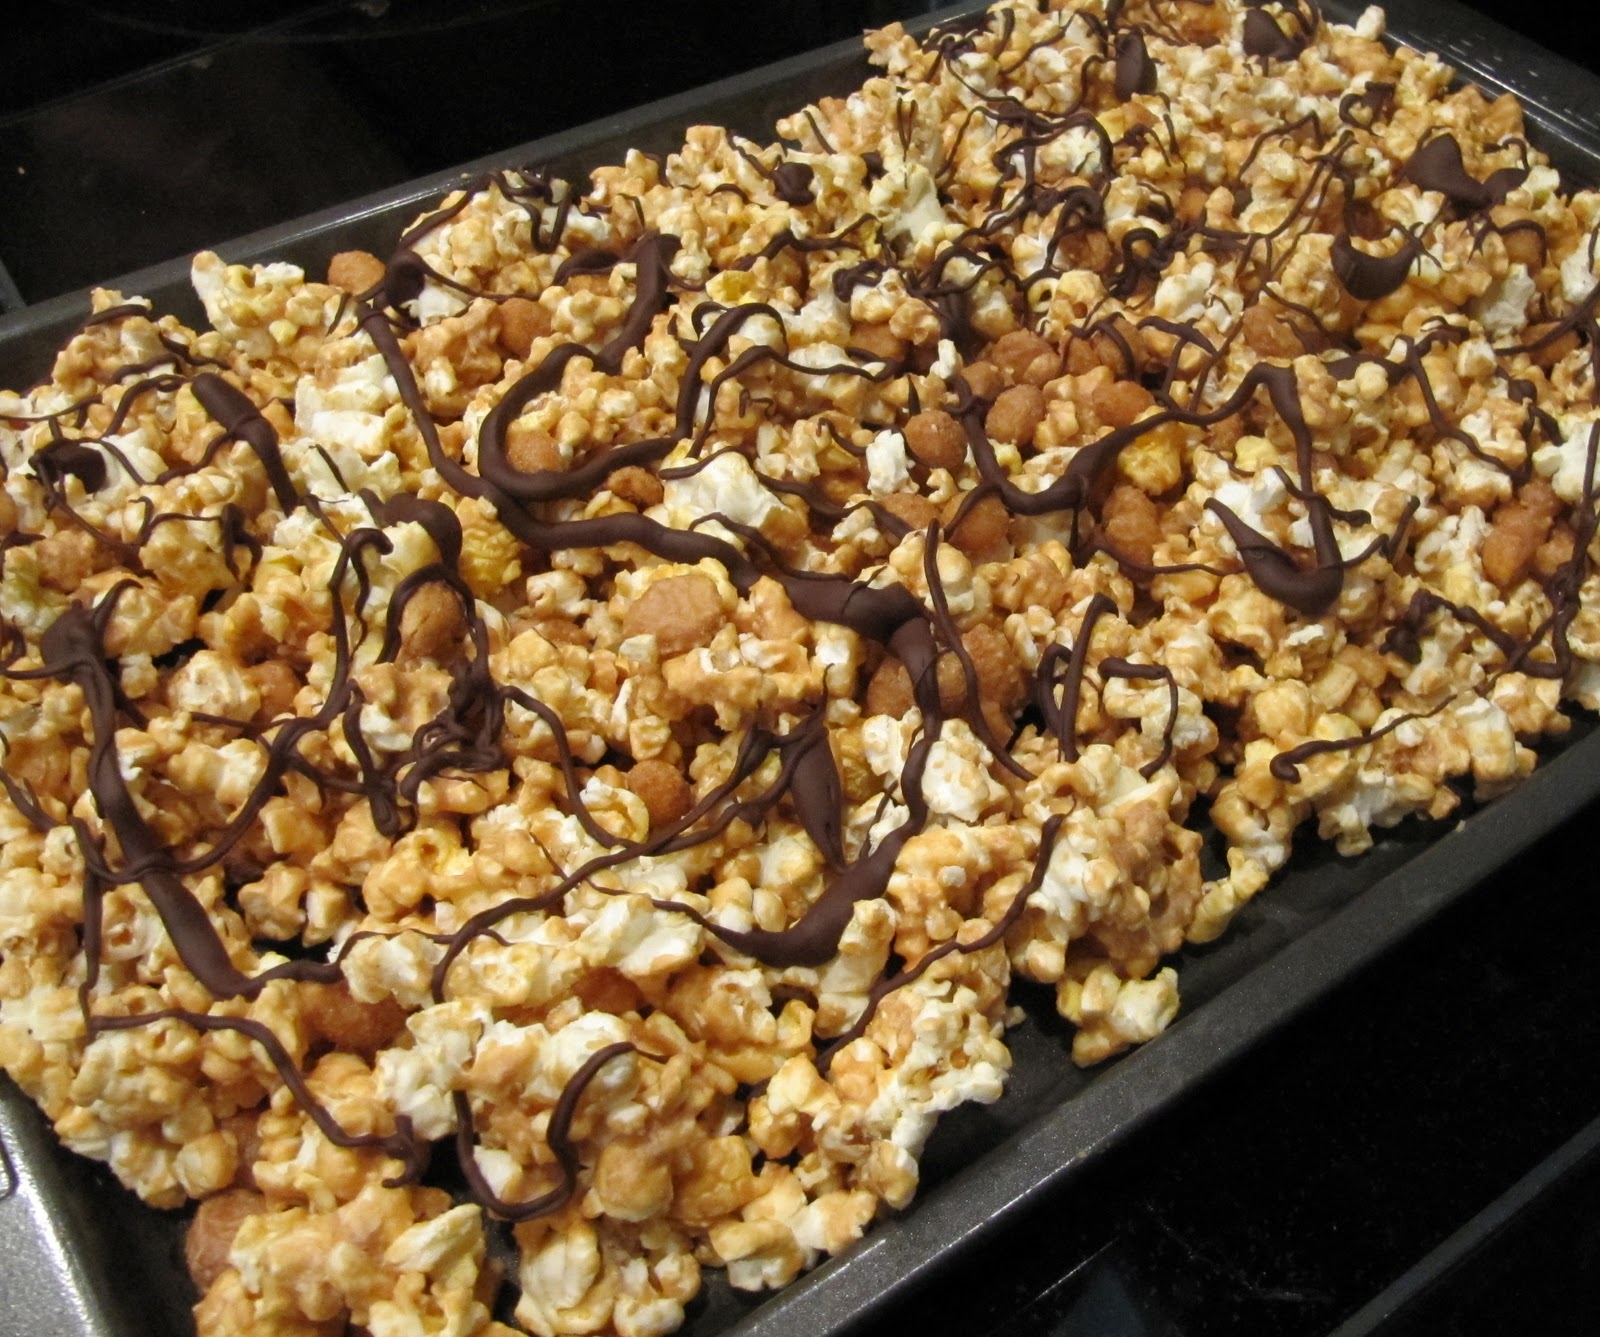
Peanut Butter Cup Popcorn


Happy first day of Autumn! Fall is probably my favorite season, next to Christmas (yes I do call Christmas a season... :) ) I just love it when the air cools down and everyone seems to be so happy because the holidays are nearing! So fun!  Too bad I am now permanently in Arizona so I can't experience the pretty fall leaves like I was so privileged to see when I went to school in Utah. :( But it's okay... 


I am seriously SO happy that it is Halloween time and that I can start baking yummy treats! I have already busted out the canned pumpkin....I made delicious pumpkin whoopie pies... recipe to come soon!! SO I thought I had already posted this recipe but to my surprise, I have not!  Popcorn is such a yummy fall treat and even though this is peanut butter, not caramel popcorn, this is a WINNER recipe! And it could be made any time of the year! It is so decadent and rich and, of course, calorie free. :) This is an easy "transitional" recipe into fall baking- because let's face it: we still have three full months left of official fall/holiday baking. So excited!!


Peanut Butter Cup Popcorn
Recipe by Our Best Bites


2 bags of Simply Salted (or similar- try to choose butter-free) popcorn (or about 20 cups of popped popcorn)
2 c. honey roasted peanuts
3 c. peanut butter chips (I used Reese’s)*
2/3 c. semi-sweet chocolate chips *
1 Tbsp. vegetable shortening or oil

Place the peanuts and popped popcorn in a very large bowl. In a microwave-safe bowl, combine the peanut butter chips and vegetable oil or shortening and heat for 2-2 1/2 minutes or until smooth, stirring every 30 seconds. Drizzle the melted peanut butter chips over the popcorn and peanuts and toss to combine.
Spread the popcorn onto a wax paper-lined baking sheet. In a Ziploc bag, heat the semi-sweet chocolate chips until just melted and smooth (about 1-1 1/2 minutes, mashing the bag every 20-30 seconds). Cut a small corner in the Ziploc bag and drizzle the chocolate over the popcorn. Allow to stand long enough to become solid (you can transfer the pan to the fridge or freezer to hurry this step along). When done, break the popcorn into small pieces and enjoy!

Thursday, September 22, 2011

Chocolate Lover's Dream Cookies


If you're thinking what I'm thinking... then you're thinking that if you have some chocolate, why not have a lot of chocolate? Right? Or am I the only one who justifies this? These cute little plump cookies are anything but dainty and pack an intense, chocolatey, fudgey punch.  If you're anything like me, you will LOVE them!


The recipe calls for chocolate and white chocolate chips but since I did not have white chocolate chips, I used some peanut butter chips.  You can use whatever you have in your pantry, too!
15 15 30 Chocolate Lover's Dream Cookies
from Taste of Home cookbook
Yields: 42 servings

  • 6 tablespoons canola oil
  • 1/4 cup butter, softened
  • 3/4 cup packed brown sugar
  • 1/2 cup sugar
  • 2 eggs
  • 1 teaspoon vanilla extract
  • 1-1/4 cups all-purpose flour
  • 1/2 cup baking cocoa
  • 1/4 teaspoon baking powder
  • 1 cup white baking chips
  • 1 cup (6 ounces) semisweet chocolate chips

  • In a large bowl, beat the oil, butter and sugars until well blended. Add eggs, one at a time, beating well after each addition. Beat in vanilla. Combine the flour, cocoa and baking powder; gradually add to oil mixture and mix well. Stir in chips.
  • Drop by rounded tablespoonfuls 2 in. apart onto ungreased baking sheets. Bake at 350° for 12-15 minutes or until edges begin to brown. Cool for 1 minute before removing from pans to wire racks. Yield: 3-1/2 dozen.


 Nutritional Information: 112 calories per cookie and 6g fat.

Monday, September 19, 2011

Foster Family Favorite: Chocolate Cherry Cake

Even though I have only a picture of the cake in its entirety, you must trust me that this is a fabulous cake!  It is truly one of my family favorites and is often requested on birthdays!

I made it a little bit ago for my mother-in-law's birthday and it turned out amazing, as always!  It is SO simple to make, very affordable, and delicious! The cherry pie filling makes the cake so moist and the chocolate glaze on top is to die for!  That is my very favorite part... mmm I'm wishing I had some chocolate cherry cake right now!!!

Chocolate Cherry Cake

1 (18.25 oz) package Devil's Food cake mix
1 1/2 cans (21 oz) cherry pie filling (just freeze the extra half of the can and use it as a topping for waffles/pancakes or make another cake!)
2 eggs, beaten
1 cup white sugar
5 tablespoons butter
1/3 cup milk
1 cup semisweet chocolate chips

Directions:
1. Combine cake mix, cherry pie filling and beaten eggs. Mix just until blended (do not overmix or mix too aggressively as cherries will break apart)
2. Bake in well-greased 9x13 pan at 350 degrees F for 30 to 35 minutes.
3. Wait until cake has cooled to make the frosting (you will want to pour frosting over cake immediately after it cooks as it thickens quickly)
4. To make frosting: combine sugar, butter or margarine, and milk.  Bring to a boil, stirring constantly and cook for 1 minute.  Remove from heat.  Stir in chocolate chips until melted and smooth.  Pour over cake immediately and spread to make it even.

From personal experience, this cake is even BETTER when eaten the day after it is baked.  Is is more moist and fudgy! But it is delicious all the same whenever you eat it!

YUM!

Sunday, September 18, 2011

Low-Fat Orange Dream Cheesecake


This chilled cheesecake is definitely still an appropriate treat for Arizona and other warm-even-though-it's almost fall biomes.  Even though I made this about a month ago, I still remember its creamy, orange-y taste and texture that was a perfect after-dinner treat.  One that doesn't leave you feeling guilty, either!


Low-Fat Orange Dream Cheesecake
adapted from Kraft

1 reduced-fat graham cracker crust (can do homemade)
2/3 cup boiling water
1 pkg. (3 oz.) JELL-O Orange Flavor Sugar Free Gelatin
1 cup low-fat Cottage Cheese
8 oz. fat-free cream cheese
2 cups thawed Cool Whip Free (or other fat-free) Whipped Topping
 Add boiling water to gelatin mix; stir 2 min. until completely dissolved. Cool 5 min.; pour into blender. Add cottage cheese and cream cheese; blend well. Pour into large bowl. Whisk in Cool Whip. Pour into prepared pan; smooth top.
Refrigerate 4 hours or until firm. Then serve! Can also freeze this cheesecake, and simply let it thaw for about 10 minutes before eating it.
 

Tuesday, August 30, 2011

Fruit Pizza


FRUIT PIZZA.  AKA ONE OF MY FAVORITE DESSERTS EVER!!
To be honest, I'm more of a decadent chocolate, peanut butter, or cinnamon-y dessert type of girl.  Don't get me wrong... I love fruit.  But I'd just prefer chocolate.  What girl wouldn't?

However, there are some fruity desserts that come along that are just unbelievable... my Best Lemon Bars, my mom's apple crisp, or my Blackberry-Peach Crisp, or this amazing fruit pizza!!  I have made this recipe a few times and every time, no fail, I cannot stop eating it! It is so addicting. And amazingly delicious.  My hubby and I made this with two of our married friends.  It's really fun to cut up the fruit and decorate it all cute! And you can use whatever fruit you like. These fruits (kiwis, strawberries and mandarin oranges are my favorites) but you could do blueberries, raspberries, peaches etc.  Basically... we finished the whole thing that night.  I ate a whole stinkin' one-fourth of this baby.  I mean... whoops....  So, just so you know, it's addicting.  You might eat the whole thing.

Just warning ya!


Fruit Pizza

1 roll refrigerated sugar cookie dough
1 package (8 oz) reduced-fat cream cheese
1/3 cup sugar
1 teaspoon vanilla
fruit of your choice- sliced strawberries. mandarin orange segments, cut-up kiwis, peach slices, blueberries, raspberries- whatever you like!
1/2 cup apple jelly (optional- I left it out)

Heat oven to 350.  Grease 12-inch pizza pan (you could also use a 9x13 pan) with cooking spray.  In pan, break up cookie dough and press evenly in bottom of pan to create the crust.
Bake 16 to 20 minutes or until golden brown.  Cool completely, about 30 minutes. (It's so hard to wait!)  In small bowl, beat cream cheese, sugar and vanilla with electric mixer on medium speed until fluffy. Spread mixture over cooled crust. Arrange fruit over cream cheese.  Stir jelly until smooth; spoon or brush over fruit. (Optional) Refrigerate until chilled, at least 1 hour.* Cut into wedges or squares. Store in refrigerator.

 *We didn't wait an hour to eat it... we were too anxious! But it is good chilled, too.  And you should definitely store in the fridge.  That is, if you have any leftovers!


Saturday, August 27, 2011

Healthified Chocolate-Almond Pudding Cake


 This recipe has 40% less fat, 75% less saturated fat, and 27% fewer calories than the original version!  And let me tell ya... you can't really even tell!  I've decided I really like the website eatbetteramerica.com! They have some really awesome, healthy recipes of all categories and every recipe I've made so far has been awesome.

If you need to get your chocolate fix without consuming a whole day's worth of calories, then you should try this cake out :)  Eating it with some reduced fat vanilla ice cream and hot fudge sauce isn't a bad idea either... :)

 Healthified Chocolate-Almond Pudding Cake
Prep Time:20 min
Start to Finish:1 hr 30 min
makes: 9 servings
1cup Gold Medal® all-purpose flour
1/2cup granulated sugar
1/4cup chopped almonds, toasted*
1/4cup unsweetened baking cocoa
2teaspoons baking powder
1/4teaspoon salt
1/2cup fat-free (skim) milk
2tablespoons canola oil
2teaspoons vanilla
1/4teaspoon almond extract
3/4cup packed brown sugar
1/4cup unsweetened baking cocoa
1 3/4cups water

Vanilla reduced-fat ice cream, if desired

Heat oven to 350°F. Spray 8-inch square (2-quart) glass baking dish with cooking spray. In medium bowl, mix flour, granulated sugar, almonds, 1/4 cup cocoa, the baking powder and salt. Stir in milk, oil, vanilla and almond extract until blended. Spread batter in pan.

In 1-quart saucepan, mix brown sugar and 1/4 cup cocoa with wire whisk. Stir in water; heat just to boiling, stirring occasionally. Pour over batter.

Bake 35 to 40 minutes or until center is set. Cool 30 minutes before serving.

To serve, spoon warm cake into individual dessert bowls; spoon pudding from baking dish over cake. Serve with ice cream.
*To toast almonds, heat oven to 350°F. Spread almonds in ungreased shallow pan. Bake 6 to 10 minutes, stirring occasionally, until light brown.

Nutrition:  200 calories, 6g fat!
Related Posts Plugin for WordPress, Blogger...